A wood-handled mop rests in a glass jar half-filled with a brownish liquid. In one fluid motion, the grill lid opens, and a big hand finds the mop. Another finds the jar. With a few sloppy slaps, flavor streams across barbecue chicken halves, sending a savory scent sizzling up from smoldering coals.
Then, back down with the lid, sealing the ceramic box filled with glowing rocks and venting smells of meat and smoke through the top.
With that view at an early age, I was curious. And why not?
This ritual I watched from toddling times was different than the normal cooking of meat. Different than hamburgers, steaks, or chops that filled our menu of patio-grilled main dishes. Especially different from anything cooked in the oven or crockpot.
No, barbecue chicken was different. It required a process and an investment in time. Special seasonings, basting mops, and sauces at the side. The results, too, were far different. Better. In my mind, a lot better.
Better enough to be a barbecue gateway. An early intro to cooking meat low and slow, a pastime I’ve practiced for many years. Not sure if I qualify as a Carolina Pitmaster, but as an adult, I’m certainly smoking a lot of meat. Visit the Low & Slow Barbecue Show Instagram for the photo proof!
My low and slow journey starts with those barbecue chicken flavors. And a worn card in the family recipe box. Maybe it can be your entry point for my family’s tradition of cooking particularly prepared cuts of meat over smoke and fire.
Unlocking a Chicken Transformation with Fire, Sauce, and Texas Barbecue Royalty
On barefoot summer weekends, I watched my Dad execute transformations. He was a patio wizard with a grill brush and tongs. A pyramid of briquettes became a bed of ashy coals. Halves of raw chicken morphed into barbecue delight on grill grates blackened by years of use.
A key component in these barbecue reactions was a liquid blend of ingredients. The soupy concoction hid in a jar at the back of our refrigerator. Finding those flavors today requires a patient dive into the internet of Southern food tradition. Or, if you’re lucky, a few minutes spent with this narrative.
And this best barbecue chicken recipe in the wide, wide world of food blogs.
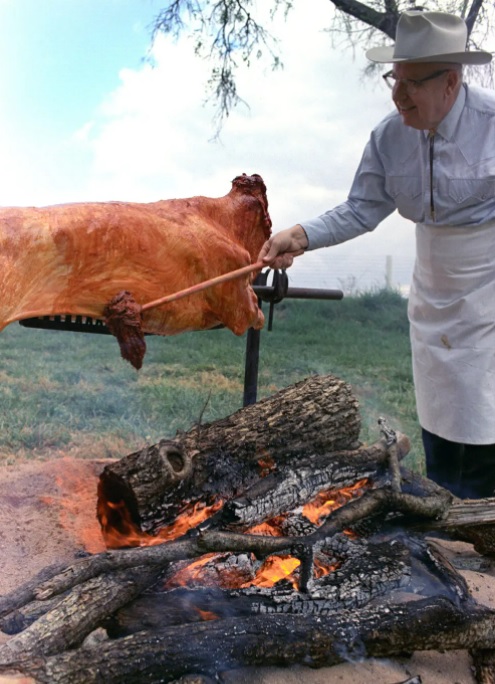
Now that you’ve found it be aware: this isn’t just any recipe for mop and meat rub. This meat mop is presidential. Better yet, it comes directly from royalty, the King of Barbecue!
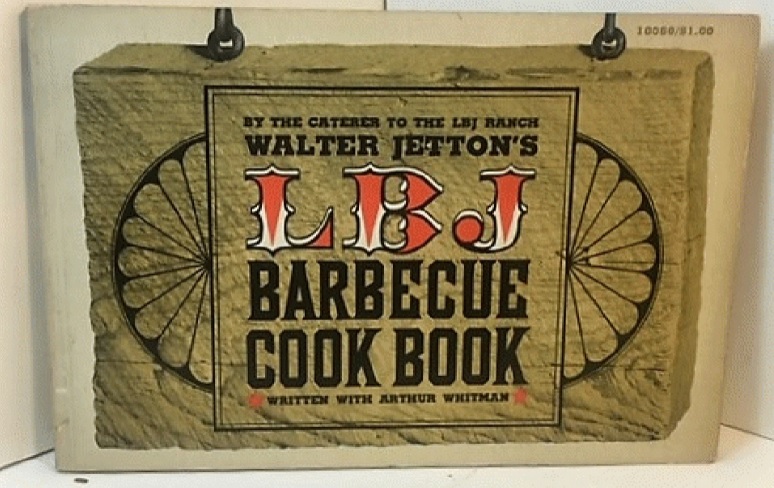
With a pair of Baby Boomer parents, including a Lone Star State native, it makes sense that Walter Jetton’s magic recipes filled their fridge and spice rack. If it was good enough for President Lyndon Johnson (and Lynda Bird, who served Jetton’s ribs in the White House), it was good enough for us. Even if we used the mop on chicken in smaller quantities than the 6 quarts Jetton used to baste a side of beef.
Recipe for Barbecue Mop for All Meats
My dad generally sat in a web strap folding chair stationed near the grill. Often, other activities occurred near the grill and cooking chicken. Honey-do list items. Stick-picking in the yard. Patient ways to pass the time.
“Every five or six minutes, use these tongs to turn over the chicken,” Dad instructed during my first barbecue cooking tutorial. “Then give it a good soak with the mop.”
Unlike a thick barbecue finishing sauce, the barbecue mop for the King of Barbecue and his loyal subjects was a thin liquid. With a splash of the mop, the mixture finds nooks and crannies around chicken skin. It collects in the rib cage. It steams into the meat, mixes with the rub, and cooks into the flavor.
Mr. Jetton does not favor basting meats with tomato‐flavored sauces as they are barbecued,” the New York Times reported on Nov. 25, 1964. “As the meats cook, they are mopped, rather than brushed … Barbecue sauce is served on the side after the meats are cooked.”
However, what the New York Times lacks in its reporting is the recipe for Walter Jetton’s Mop for All Barbecue Meats.
Ingredients:
2 tsp salt
2 tsp dry mustard
1 tsp garlic powder
1/2 tsp ground bay leaf
1 tsp chili powder
1 tsp Louisiana Hot Sauce
1/3 cup Worcestershire sauce
1/6 pint vinegar
3 cups beef stock
3 ounces oil
1 tsp MSG (omit as desired)
Combine all ingredients and heat until it simmers. Allow the solution to cool and sit overnight. Warm before applying liberally to the meat while it cooks.
Yield: About one quart of barbecue mop.
Chicken Rub to Use Before You Cook
Like our barbecue mop hiding anonymously in our Alabama fridge, the Walter Jetton’s barbecue chicken rub was stored in an appropriate fashion. An empty Season-All shaker found new life with a masking-tape-and-marker name tag: “Poultry.” Other homemade pantry peers in the spice rack: “Ribs.”
If you dissect the Poultry shaker spices, these are the ingredients you find:
2 Tbs paprika
1 Tbs chili powder
1 Tbs brown sugar
1 Tbs sea salt
2 tsp ground cumin
2 tsp ground black pepper
1 tsp thyme
Barbecue aficionados argue about the application and timing for the rub against the meat. When it comes to this rub recipe and barbecue chicken, I won’t claim one method is better. I can, however, outline what I watched as a child on summer Sundays.
Generally, a halt was brought to after-church gardening or other outdoor activities around mid-afternoon. Chicken halves went from the refrigerator to a wax paper unfurled across the kitchen counter. Generous application – but not caking – of the “Poultry” shaker covered the chicken’s meat and rib sides. (Today, I’d encourage you to work that rub under the skin a little bit, but don’t go crazy. Leave the skin on to protect the tenderness.)
Let the chicken sit out for 30-45 minutes. Don’t worry; it is still safe outside the fridge for up to 3-4 hours. This helps ensure an even temperature from the start of the cook. Now, get the grill ready and warm up your mop to a temperature just below a simmer.
How Do You Cook Barbecue Chicken?
I’m not sure my age when the question first came up. I know I was pretty young when curiosity overflowed into the desire to do it myself.
And there was probably a lot of “let me try” before Dad turned over the mop completely. At first, I got a turn to baste. Opening the grill lid and turning the chicken came a little later. So did building a fire.
Eventually, though, I got my chance. Here’s what the process looked like:
Start a Charcoal Fire
- Build a pyramid of charcoal briquettes.
- Soak pyramid in lighter fluid (I would NEVER do now).
- Wait 8-10 minutes for the fluid to soak in. Bricks look dry? Fire it up. (Again, never use fluid. Just get a chimney. It works better, more evenly. AND your food won’t taste like gas).
- Ignite charcoal using as many matches as possible until Dad takes matches and box.
- When the outer pyramid takes a gray coat, spread the bricks evenly in the grill belly.
- Close the grill lid and let the grates get hot. Use a wire brush to remove any remnants of the last cook.
How to Cook Chicken – or at Least How I Cooked it Then
- When the grill is hot, put the seasoned chicken halves rib side down on the grates, directly over the hot coals.
- Turn the chicken every 5-7 minutes.
- Each time you turn the chicken, mop it liberally.
- Depending on your grill temp, you’re getting close to done in about 50 minutes. Use the tongs to wiggle the drumstick. Is the hip joint loose and moving easily? Your chicken is done.
Modern-day Caveats: Alternate Chicken Recipe Suggestions
Did I mention, never use lighter fluid?
Apart from that, I suggest a few additional improvements to our approach in the 1980s. These updates might deliver better results.
- Add wood to the charcoal. Duh. I want more than charcoal if we’re smoking meat low and slow. Applewood and cherrywood are my go-to.
- Cook it lower. And slower. And use a thermometer. More than anything, I’ve always relied on the look and feel of the meat and the grill. That won’t change but getting the temp right – and controlling it – delivers a better product.
In the end, as is the case with most barbecue adventures, if you’ve got a good fire, meat, seasoning rub, and barbecue mop – it is kinda hard to screw it up.
WARNING! DO NOT DROP THE CHICKEN
Thinking back on when my cook was complete, my barbecue chicken done, I was proud.
It looked good – like Dad’s. It smelled good. I did all the right things. I knew it was gonna taste good.
I got the approving nod of “done” from Dad.
So, off the grill and onto the plate goes the barbecue chicken. Maybe it was my first. Maybe not. But on one of those early cooks, I learned a valuable lesson: plates are slick and cooked meat is inclined to slide.
Elated, I spun toward the house, plate of barbecue pride in my hand, and watched as one chicken half slid right to the ground. Fortunately, only Dad saw it.
And in one fluid motion, I swept a hand to the ground while the other held the plate. I scooped up the chicken. With a few sloppy brushes, I knocked the grit off my prize and left the rest as flavor for my best barbecue chicken.
FAQ: Additional Questions about Cooking Barbecue Chicken
Are alternative methods for cooking barbecue chicken?
Yes, there are cooking suggestions and variations for preparing barbecue chicken using alternative cooking methods such as a smoker or oven. Here are some common approaches:
Smoker
When using a smoker, you can follow a similar process to grilling but with the added benefit of low and slow cooking, which imparts a rich smoky flavor to the chicken. Preheat your smoker to a temperature between 225°F and 250°F. Season the chicken with your preferred rub or marinade, then place it on the smoker grates. Maintain a consistent temperature and smoke the chicken until it reaches an internal temperature of 165°F, typically 2 to 3 hours depending on the size of the chicken pieces. You can use wood chips or chunks of your choice for additional smoke flavor.
Oven
If you don’t have access to a grill or smoker, you can still achieve delicious barbecue chicken in the oven. Preheat your oven to 375°F. Season the chicken with your chosen rub or marinade, then place it on a baking sheet or in a baking dish. Cook the chicken in the oven for approximately 45 minutes to 1 hour, or until it reaches an internal temperature of 165°F. For added flavor, you can brush the chicken with barbecue sauce during the last 10 to 15 minutes of cooking.
Instant Pot or Pressure Cooker
Another alternative cooking method is using an Instant Pot or pressure cooker for barbecue chicken. Season the chicken with your preferred rub or marinade, then place it in the Instant Pot along with a cup of barbecue sauce and a splash of water or chicken broth. Cook the chicken on high pressure for 8 to 10 minutes, then allow for a natural release of pressure for 5 minutes before manually releasing any remaining pressure. Once cooked, you can shred the chicken and toss it with additional barbecue sauce before serving.
These alternative cooking methods offer flexibility for those without access to a grill or who prefer indoor cooking options. They still allow for flavorful barbecue chicken without compromising on taste.
Do you put barbecue sauce on chicken before or after baking?
It’s typically recommended to apply barbecue sauce to chicken before baking to allow the flavors to infuse into the meat as it cooks. However, you can also apply sauce after baking if you prefer a thicker or caramelized coating. Experiment with both methods to find your preferred taste and texture.
Can you put BBQ sauce on raw chicken and cook?
Yes, you can apply BBQ sauce to raw chicken before cooking it. However, be cautious not to cross-contaminate other surfaces with raw chicken juices and ensure the chicken reaches a safe internal temperature of 165°F (75°C) to prevent foodborne illness.
Do you put BBQ sauce on both sides?
Whether you apply BBQ sauce to both sides of the chicken depends on personal preference. Some people prefer to coat both sides for maximum flavor, while others choose to apply sauce only to one side for a lighter coating. Experiment to find what works best for you.
How long should you cook barbecue chicken?
The cooking time for BBQ chicken can vary depending on factors such as the size of the chicken pieces, the temperature of your grill, and whether you’re using direct or indirect heat. As a general guideline, bone-in chicken pieces usually take about 25-30 minutes per side on medium heat. Use a meat thermometer to ensure the internal temperature reaches 165°F (75°C) for safe consumption.
Do you cover chicken when baking?
Covering chicken while baking can help retain moisture and prevent it from drying out. However, if you prefer crispy skin or caramelized barbecue sauce, you can bake the chicken uncovered for part of the cooking time and then cover it towards the end to finish cooking through.
How do you get barbecue sauce to stick to baked chicken?
To ensure barbecue sauce sticks to baked chicken, pat the chicken dry with paper towels before applying the sauce. You can also brush a thin layer of oil or melted butter onto the chicken before adding the sauce, which helps the sauce adhere better during baking. Additionally, applying the sauce in layers and allowing it to caramelize slightly during baking can enhance its stickiness.
About the Author

Smoked meat, barbecue enthusiast, news journalist, and sports radio broadcaster Michael “Chigger” Willard collects a storybook of life captured through the lens of people he encounters. With a perspective seasoned by small town life in the Deep South, he dedicates conversations to uncovering savory nuggets of information, light-hearted moments of humor, and revealing glimpses of humanity.
Want more?
- Podcast Episodes
- Barbecue Blogs
- BBQ News & Recipes
Subscribe to The Lowdown BBQ Newsletter!
